Clip Describe how to fold a letter for a standard #10 business envelope and for a window envelope? ?
Kinh Nghiệm Hướng dẫn Describe how to fold a letter for a standard #10 business envelope and for a window envelope? Chi Tiết
Dương Minh Dũng đang tìm kiếm từ khóa Describe how to fold a letter for a standard #10 business envelope and for a window envelope? được Cập Nhật vào lúc : 2022-10-15 00:55:27 . Với phương châm chia sẻ Mẹo về trong nội dung bài viết một cách Chi Tiết 2022. Nếu sau khi Read tài liệu vẫn ko hiểu thì hoàn toàn có thể lại Comments ở cuối bài để Ad lý giải và hướng dẫn lại nha.Electronic mail has significantly reduced the amount of regular mail sent daily through the post office. Although there are many advantages to using email for most business correspondence, there are still many instances when old-fashioned "snail-mail" is preferable, such as when original signatures are required. These business letters are usually more formally constructed than email messages. It is necessary to follow conventions in both the format of the letter and the proper way to fold a business letter to fit into a business-sized envelope.
Nội dung chính- 1. Lightly Fold Up the Bottom Edge of the Letter 2. Fold the Top Edge of the Letter Down 3. Slide the Letter into the Envelope Easy Traditional Origami Letter Fold Standard EnvelopeStep 1:
Cut to Size Step 2: Fold in Half Step 3: Fold Down CornersStep 4: Fold Bottom UpStep 5: Fold Bottom Up AgainStep 6: Fold the Top DownStep 7: Fold the SidesStep 8: Fold Tabs UpStep 9:
Finish It UpEnvelope with Beveled CornersStep 1: Fold in half.Step 2:
Rotate and Fold Corners Step 3: Fold SidesStep 4: Fold Corners InHow do you fold a note step by step?
1. Lightly Fold Up the Bottom Edge of the Letter
Place the letter flat on the table, right-side up. Place the ruler along one of the sides of the letter. Align the end of the ruler with the top of the page. Lightly fold the bottom edge of the letter up until it meets a place on the ruler that is one third the length of the letter from the top edge. For example, if the length of the page is 11 inches, 1/3 from the top of the page will be 11 inches divided by 3 = about 3.5 inches. Do not yet press this fold firmly.
2. Fold the Top Edge of the Letter Down
Fold the top edge of the letter down until it meets the folded edge made in Step 1. Align all the edges of the letter, making sure they are all perfectly straight. Firmly crease the paper along both folded edges.
3. Slide the Letter into the Envelope
Hold open the flap on the business envelope with one hand. Hold the letter in the other hand, so that the top part of the letter will be the top of the letter. Slide the letter into the envelope.
Insert one bottom corner of the long end of the letter into the mouth of the envelope, then the other side, if the envelope is the type that has the opening on the longer side. Insert one short end of the letter into the mouth of the envelope if the opening is on the short end of the envelope. Seal the envelope.
TipWhen using envelopes that open on the short end, it is easier to insert the letter if you hold the envelope slightly open by placing your thumb and forefinger on each side of the envelope and slightly bring your thumb and finger towards each other. This will widen the opening of the envelope.
WarningHandle the paper carefully or you could get a paper cut from the edges.
Easy Traditional Origami Letter Fold
A traditional origami letter fold makes an interesting six-sided shape that can be used as an envelope. Alternatively, you can write your note directly on the paper and use the origami letter fold to make the letter its own envelope.
This origami requires one sheet of rectangular paper, so you can use letter paper, A4 paper, or just paper ripped out from a notepad. The A4 size we use results in a letter that is 14.8 x 10.5 centimeters.
Step 1
The Spruce / Chrissy Pk1. Start with the white side or writing side of your paper facing up.
2. Fold the paper in half from left to right and then unfold back to the start.
3. Now you can fold the top right corner down diagonally, lining it up with the central crease you just made.
4. Fold the bottom left corner up diagonally again, lining it up with the central crease.
Make sure these folds are nice and neat, or you'll end up with some of the writing showing up in the middle.
Step 2
The Spruce / Chrissy Pk5. Fold the bottom section up, aligning it with the bottom of the flap above.
6. Repeat the last step on the top section.
7. Fold the bottom right corner up to meet the top.
8. Put the end of the flap underneath the top section.
Step 3
The Spruce / Chrissy Pk9. Bring the top left corner down, aligning with the bottom edge.
10. Again, put the flap underneath the little triangle there.
Now it's finished. You can turn it over and use the plain side to write a name or message.
in: How To, Skills
• April 16, 2022 • Last updated: June 2, 2022
Nowadays, if you get a message from someone, it’s likely to show up on your phone, in your email inbox, or within your social truyền thông apps. It’s all too rare to get an actual letter in your actual mailbox. That space seems reserved for bills and catalogs/coupons you’ll probably directly transfer to the recycling bin.
Getting a real letter feels like a unique moment and there is a special excitement that goes along with seeing who sent it and opening it up. In other words, handwritten letters have a magic to them that cannot be replicated digitally. So, it only makes sense that if you’re going to send a letter, you take the time to make it extra special. You might use special paper, add a wax seal to the back, or, in the case of this how-to, learn how to incorporate a bit of origami.
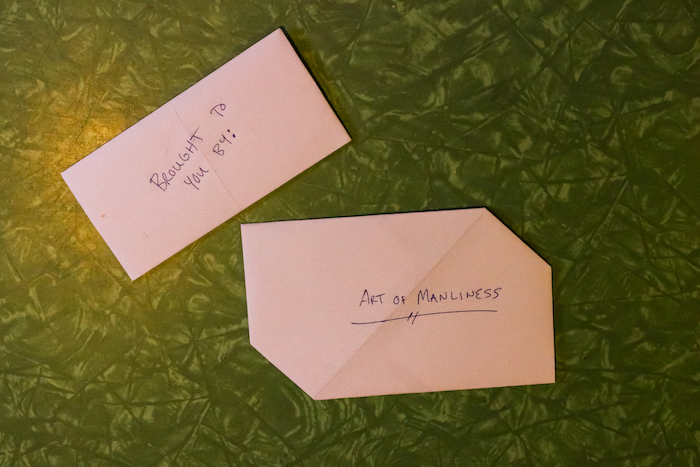
For this project, we’re using origami to turn your letter into its own envelope. It’s a special twist and a welcome bit of know-how if you ever find yourself without an envelope. We’re showing two designs here (the second is a bit easier to execute than the first), both of which should comply with US Postal Service requirements for standard letter sizes, so you won’t have to pay extra postage to send them out. While these folds do make remarkably sturdy little envelopes, it would probably be wise to reinforce them with a bit of tape before sending out.
Let’s get into how to do it.
Standard Envelope
Note: This folding method is typically done with A4 paper. A4 paper is standard printer paper throughout much of the world, including Europe and Asia. This paper is slightly longer and more narrow, so we’ll first need to trim down a sheet of standard 8.5″ x 11″ to make this one work.
Step 1: Cut to Size
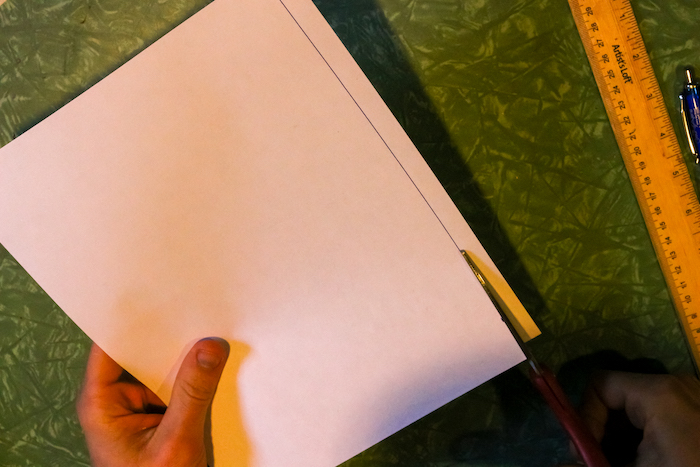
Remove a half-inch of paper from the long side of your letter.
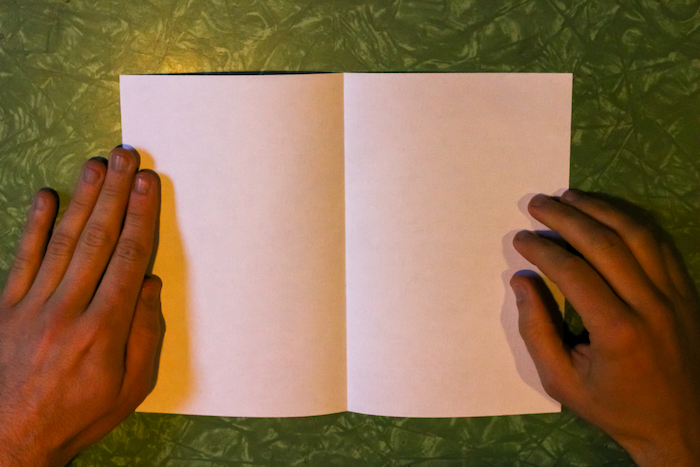
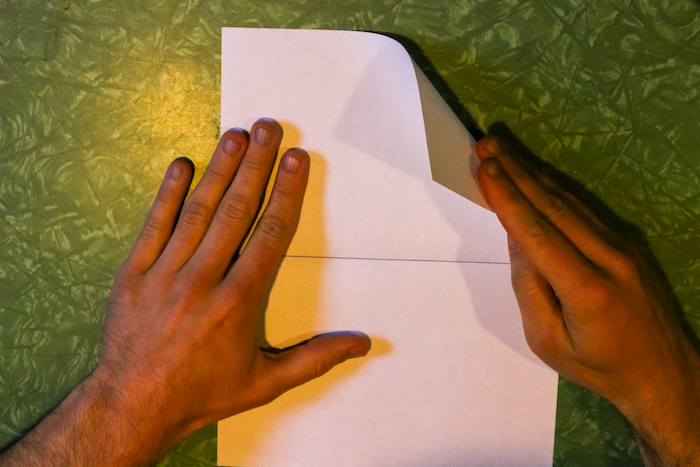
Step 2: Fold in Half
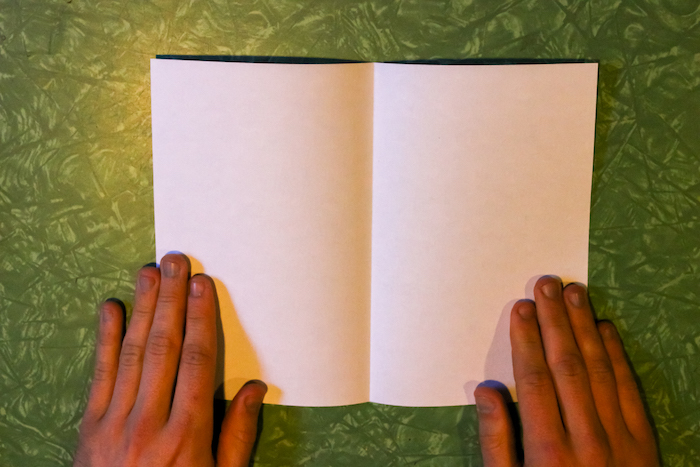
With the long side on top, fold in half left to right and then unfold. The idea is to create a center crease.
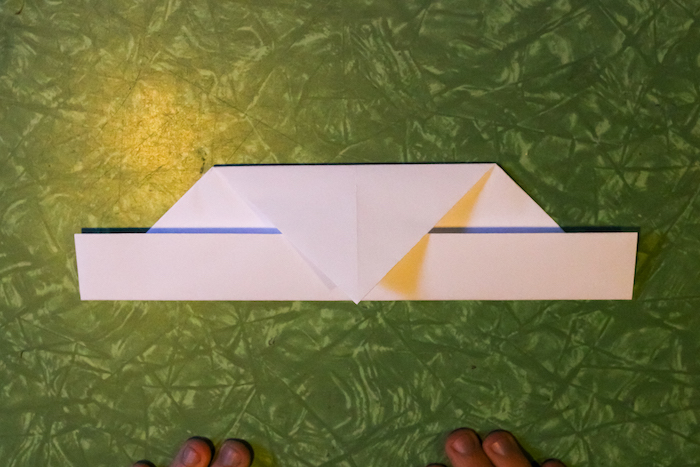
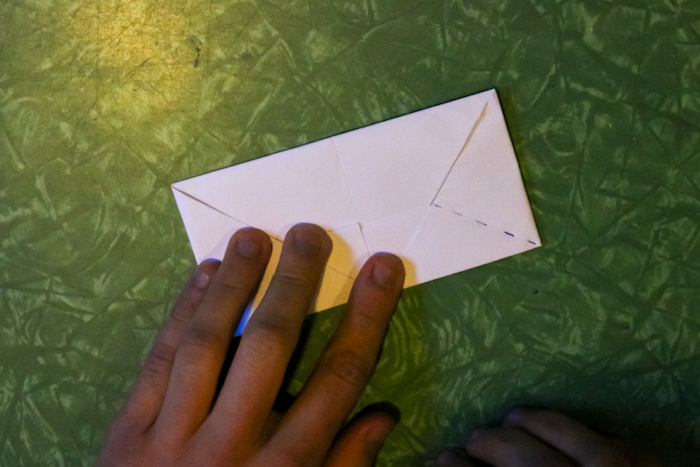
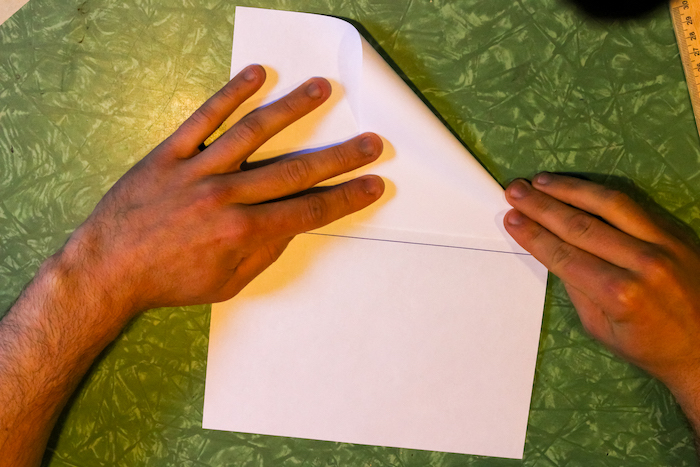
Step 3: Fold Down Corners
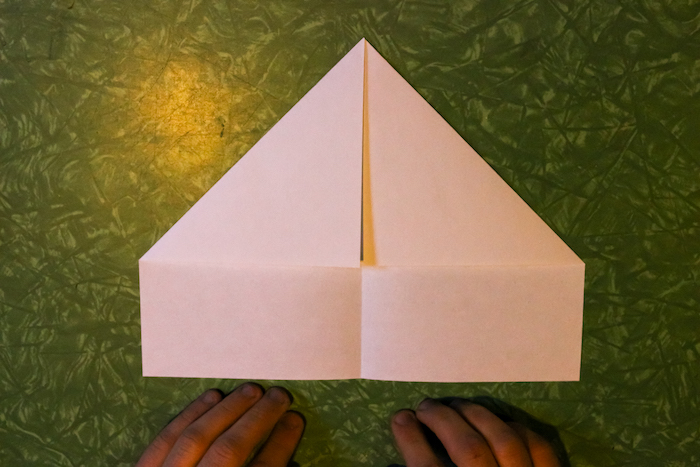
Fold the top right corner down to the center crease and then repeat with the top left corner.
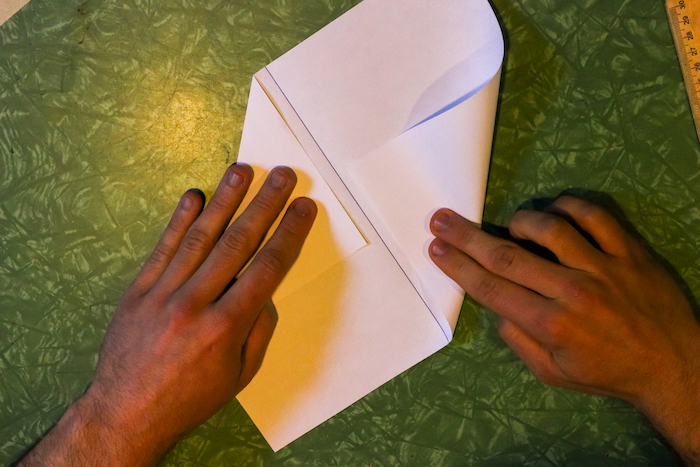
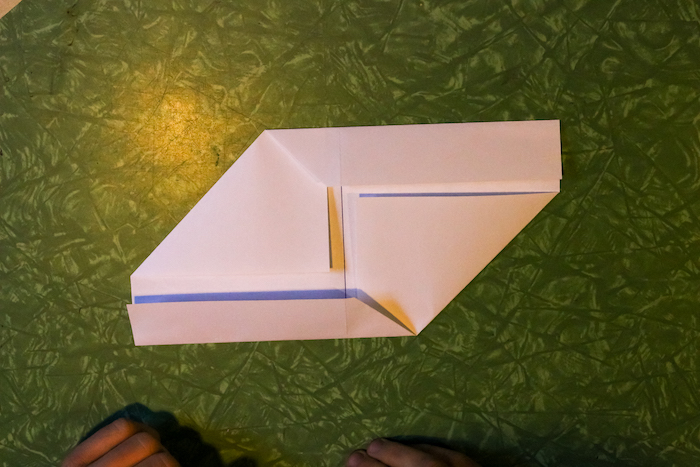
Step 4: Fold Bottom Up

Fold the bottom of your letter up to meet the base of the triangle you just made.
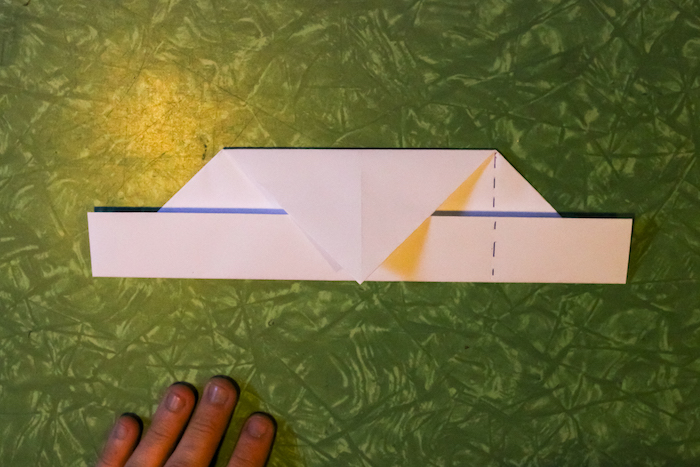
Step 5: Fold Bottom Up Again

Fold the bottom up again, along the line that separates your bottom rectangle from the top triangle.
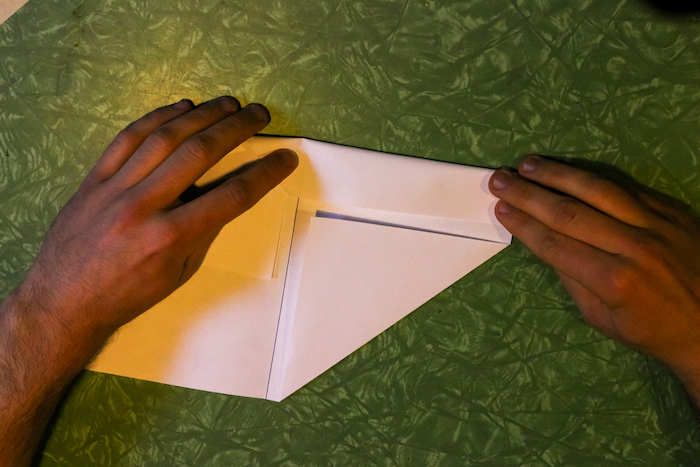
Step 6: Fold the Top Down
Fold the tip of your triangle down to meet the bottom edge.
Step 7: Fold the Sides
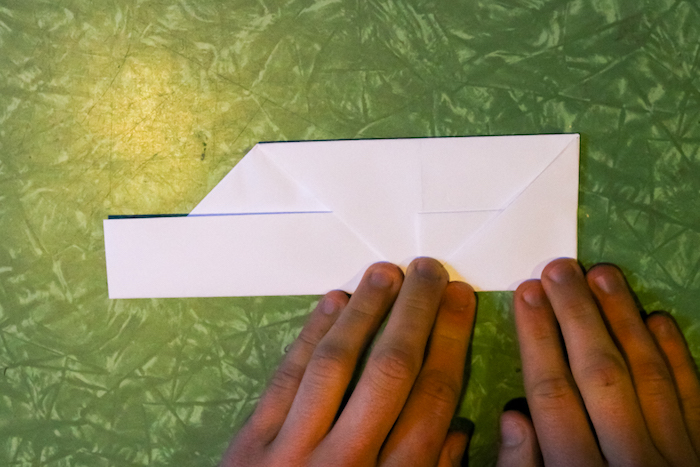
Fold the sides in to create a square edge to your envelope. I’ve added a dotted line on the right to show where to make the fold.
Repeat on the other side.
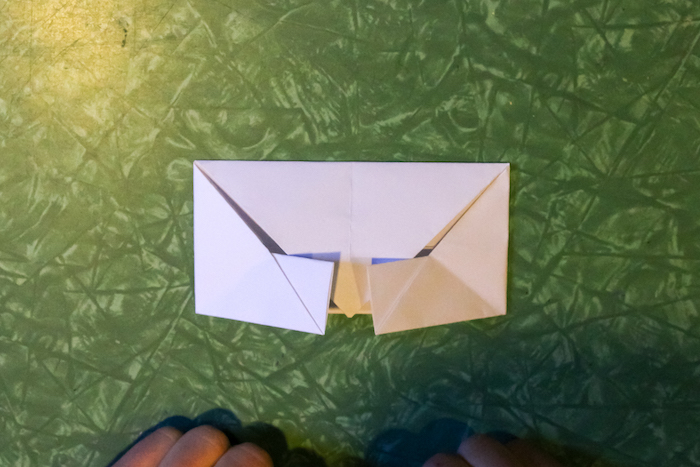
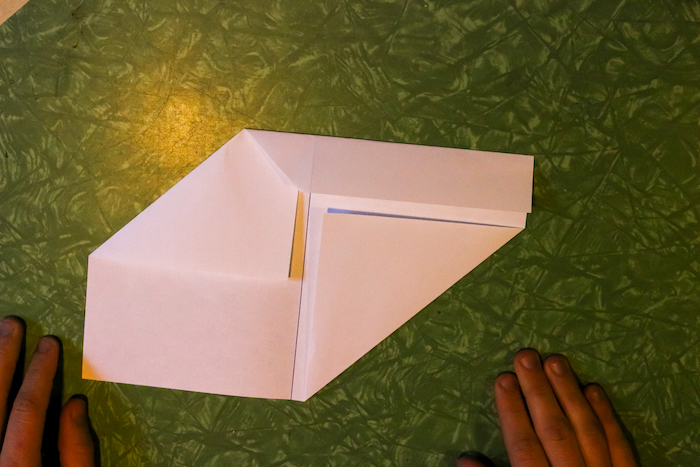
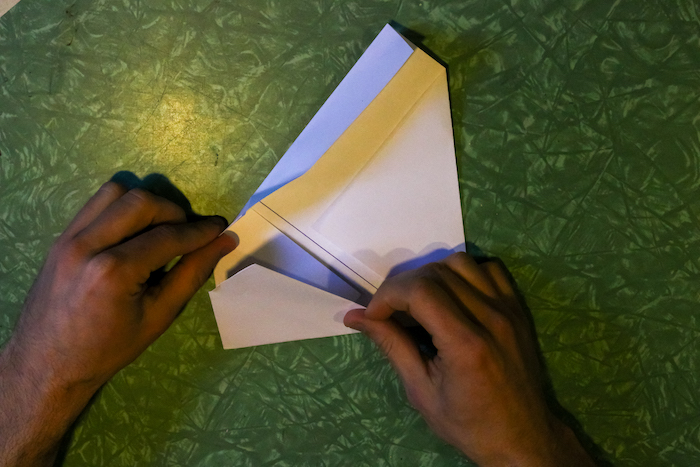
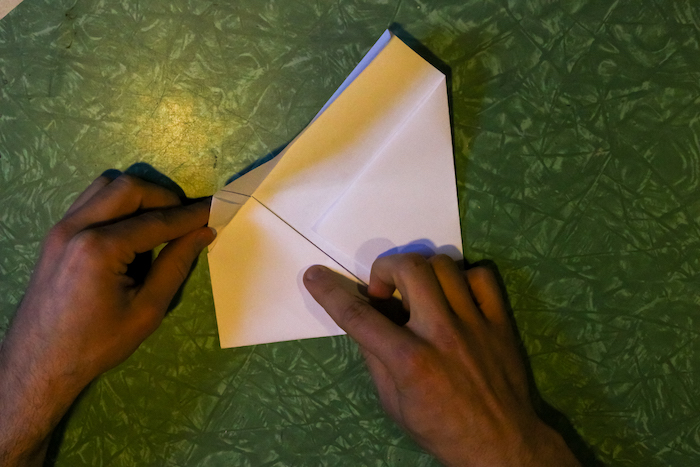
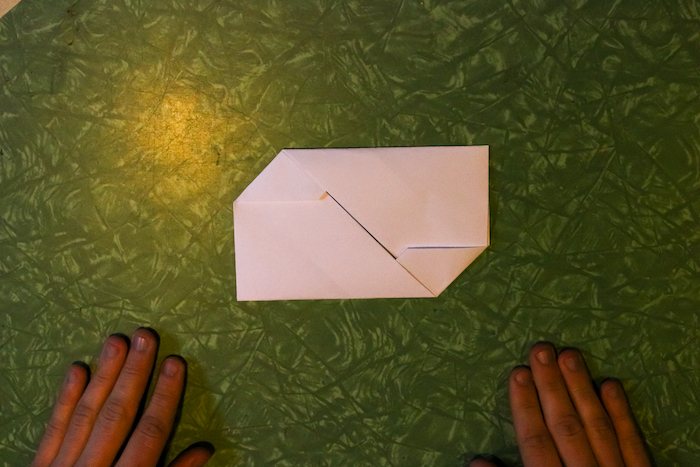
Step 8: Fold Tabs Up
Take the tab you folded over in Step 6 and fold it up so that the crease line is roughly perpendicular to the line of your triangle piece.
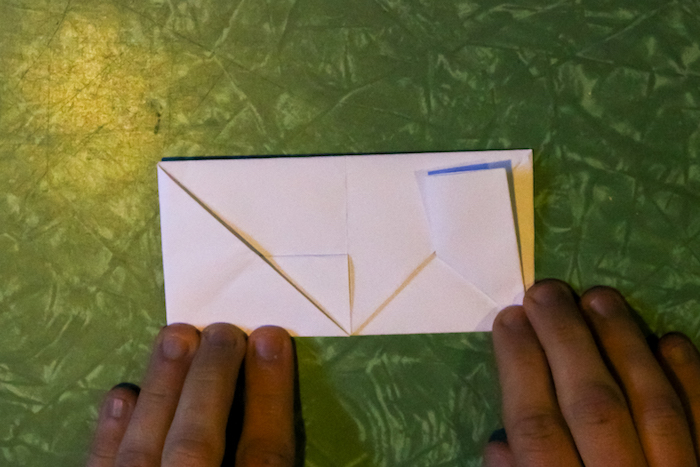
It should be slightly less than square to the short side of your envelope.
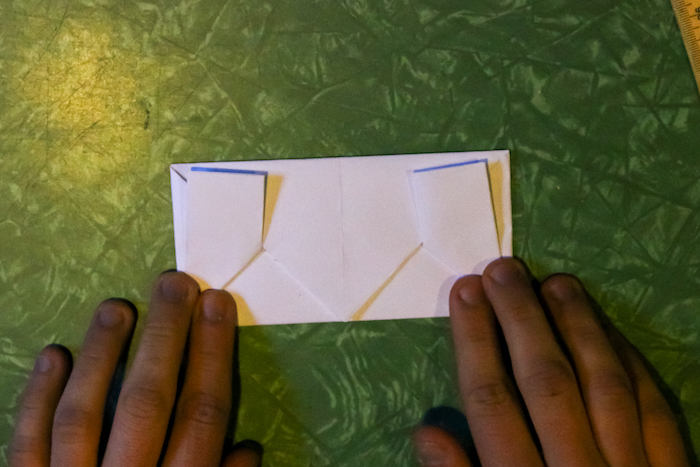
Repeat with the other side.
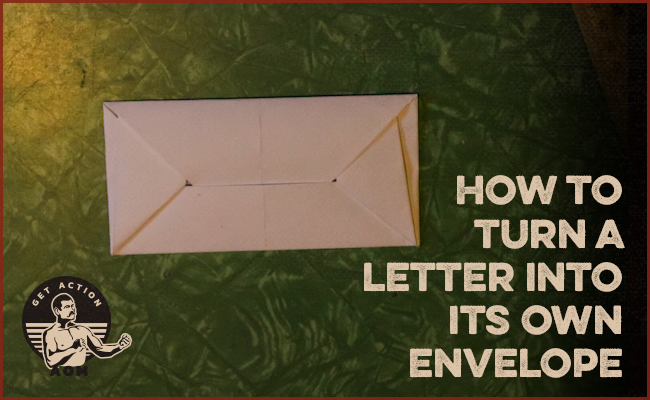
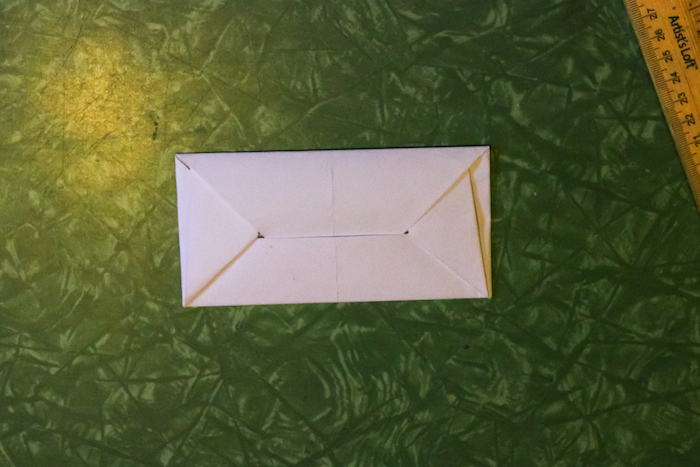
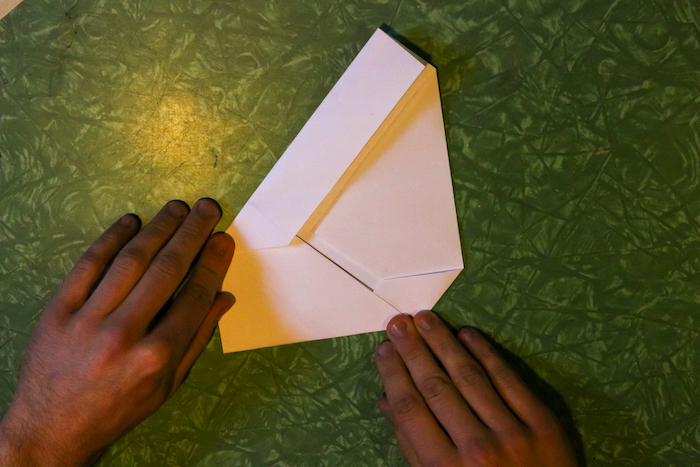
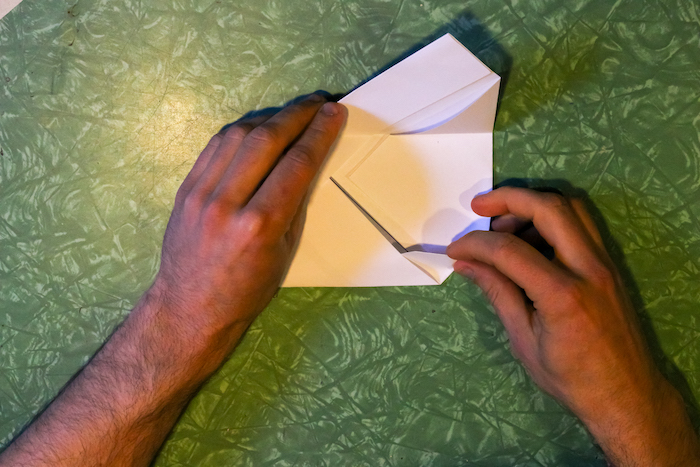
Step 9: Finish It Up
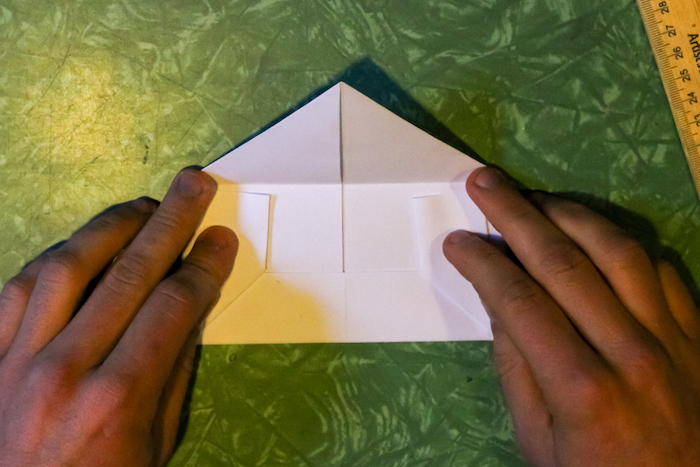
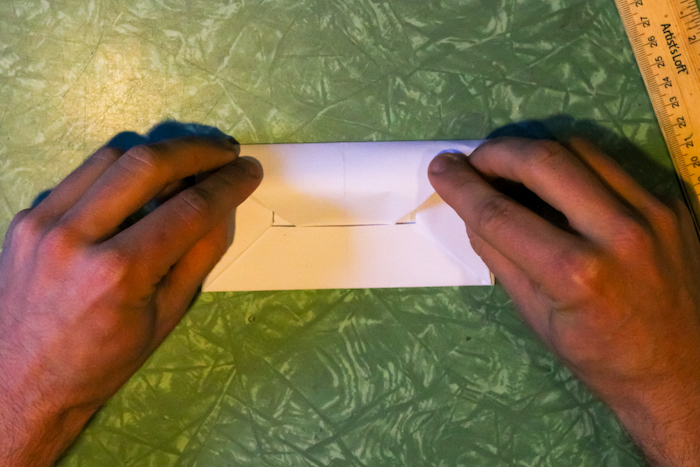
Lift up your triangle flap and then fold it back down over your tabs and under the flap the base of your envelope.
Envelope with Beveled Corners
Note: This style works fine with normal 8.5″ x 11″ printer paper. No trimming is necessary.
Step 1: Fold in half.
With the long side on top, fold your letter in half left to right, then unfold.
Step 2: Rotate and Fold Corners
I’ve drawn a line on the middle crease just to help you see it better.
Rotate the letter 90 degrees, so the short side is toward you. Fold the top right corner almost to the middle of the page, where your seam is. The goal is to have this fold stop about a half-inch away from the middle crease.
Repeat with the opposite corner.
Step 3: Fold Sides
Rotate so that the long side is once again the top. Fold the top down toward the middle, leaving a half-inch gap between the edge of your folded corner and the folded side.
Repeat with the bottom edge.
Step 4: Fold Corners In
You should now have two square corners that are opposite to each other. Take one square corner and fold it to the opposite side of the letter so that the edge matches up with the middle crease of your paper.
As you fold, lift the long flap and tuck the corner under.
Repeat with the other square corner.
You should have two tucked-in corners, and you’re done!
Previous Next
How do you fold a note step by step?
Take a regular sheet of notebook paper and write your note on it. Then, fold over the top right corner so the top edge of the paper is lined up with the left edge. Fold the top right corner over again to make a triangle shape the top of the paper. Flip the paper over, then fold the bottom up about 1/3 of the way. Tải thêm tài liệu liên quan đến nội dung bài viết Describe how to fold a letter for a standard #10 business envelope and for a window envelope?